Have you ever heard of slip, or “slipware,” as it is sometimes called? It’s a type of pottery that has been made for centuries. And the process of making this type of pottery hasn’t changed much since its inception.
In this blog post, we’ll learn about how slips work and how you can make it so you can get started with your own!
What Exactly is Slip in Ceramics and Pottery
Slip is a clay-based material used in pottery making. You can make it from water and clay, which you mix to form a slurry or liquified clay. You can then apply it to ceramic surfaces for decoration or as a first layer of covering before painting.
You can also use slip in the production of porcelain. You can water it down to an appropriate consistency before being applied. Still, you can use opaque or white slip in its thick form. You can also combine it with various additives for special effects, such as straw or mica.
Slip was probably first used by Neolithic cultures about 6000 years ago. The pottery excavated from the Neolithic village of Khirokitia on Cyprus has revealed extensive use of slip.
Why is it Called Slip?
The word slip comes from the Old English “slippan,” meaning “to send forth” because liquid clay was once poured or thrown out of a vessel, typically wooden. It is so named because it is used in slip casting ceramics, where excess slip is poured away, causing seams or “slips.” What is left is a ceramic cast ready for firing. The term ‘“Slippage” may also have originated from “slippery clay.”
How is Slip Used in Pottery?
Slip is used in pottery making to create ceramics, mainly jugs, cups, plates, and other cylindrical vessels. Ceramic artists also use slips to form decorations like rims and bases. It is also used as a glue to join broken pieces of dry clay, as well as to attach parts like handles that must be leather hard before they can be attached.
How to Make Clay Slip
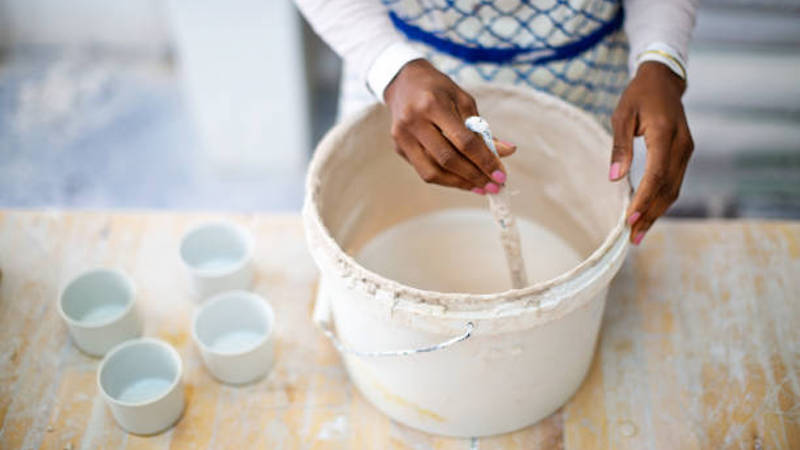
The easiest way to make slip is with an electric stand mixer. The mixer ensures thorough mixing, with no dead spots or unmixed areas within the bucket. I recommend making a minimum of one litre at a time. Any smaller, and the effort is not worth it.
Mixing slip in an electric stand mixer
- Fill the bucket with aliquots of clay slurry, then add water by hand.
- As the mixer stirs, the mixture will go from being quite liquid to forming a ‘dough ball’ which spins around in the bowl. You must reach this stage; otherwise, unmixed pockets of clay will form within the slip. If you don’t have a mixer, you can vigorously stir the mix with a wooden spoon for 5 minutes or so.
- The dough ball stage of slip mixing, just before it starts to splash out of the bowl. The ingredients should now be thoroughly mixed and evenly dispersed at this point.
The most challenging aspect of making slip is adding water in the correct quantity. The aim is to produce smooth, even slip which is neither too thick nor too thin. If it’s the latter, then it won’t penetrate the gaps within a clay body, and you’ll get plenty of pinholes in your glaze layer. On the other hand, if too thick, the glaze will crack during drying and firing.
What is the Ideal Consistency for Casting Slip?
An easy way to test the consistency of slip is to make a small puddle and drag your finger through it. If the furrow closes straight back up, then it’s not thick enough. If it remains open or takes a few seconds before it closes, then it’s too thick and needs more water.
Achieving the correct consistency is something that you need to learn through practice and experience. I generally aim for a consistency of single cream, i.e., so that my finger sinks into it without leaving an indentation. It should not be so thin that it runs off your finger or too thick that it doesn’t move. If the slip is too watery, add more clay. Too dense, add more water.
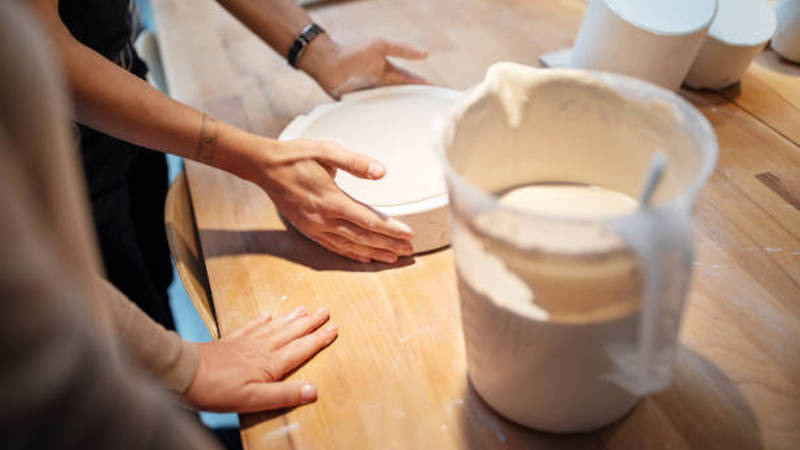
How is Slip for Casting Prepared?
One of the best ways to get experience with making different types of slip is by playing around with other recipes and seeing what works. I also suggest mixing several small test batches and testing on different clay bodies to see what works best.
When making a large batch of slip, you must add all ingredients in the correct order and at the right time. Add them in this sequence:
- Clay
- Silica (fine sand or frit if using a frit-based slip)
- Add water to the point where the slip starts to splash around in the bowl
- Add any other ingredients
- Mix for a minute or so
- Add more water if needed
The final step is essential, as adding an ingredient in the middle of mixing can cause it to be thrown out and wasted.
Finally, remember to leave your slip for 30 minutes or so to settle before use. Some clay types (e.g., stoneware) may need longer than others due to their larger particle size and dense nature. you can shorten the time if you re-mix with a stick blender after a few minutes
Can You Make Slip Without a Mixer?
You can make a slip in a container without using a mixer by stirring it with a dowel or paddle. It is important to keep stirring until the clay and water are thoroughly mixed together; if this process takes too long, the clay will settle.
How to Store Slip
As a potter, you are always looking for ways to save money; one way is to extend the life of clays used in your work. Follow these two steps for storing your homemade slip, so it’s ready to use when you want it!
- Choose a container that is clean, dry, and food-safe. You can use mason jars because they seal tightly enough to store liquids; however, any airtight container will work (be sure that metal lids don’t touch your wet slip, or it will rust).
- If you do not intend to use the slip immediately, label and date the jar as above, then store it upright in a cool place. You should discard Store-bought clay slips after six months due to bacteria growth; however, homemade versions can last for years if properly stored.
Homemade slip has a limited shelf life, and the life will vary depending on how often you use it and what kind of container you store it in. Properly labeled and stored, however, this solution should last for several years.
If you see any separation, add a small amount of alum (about one teaspoon per quart) and mix well into the container of slip. You can also check to ensure your slip has good consistency by squeezing out a ribbon of it between your fingers; if it breaks off and is smooth without cracks, your good to go!
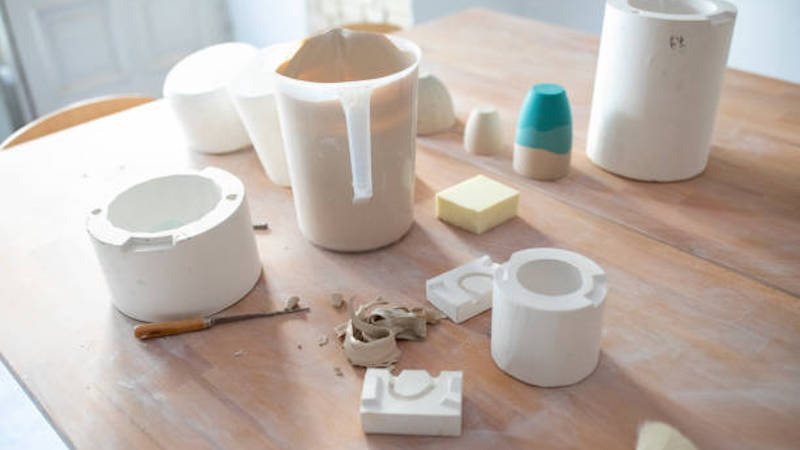
What is Slip Casting?
Slip casting is a ceramic manufacturing process where clay casting slip, is poured into a plaster mold. After this, the excess is removed by rotating the mold one way then another before being placed on a fast-spinning wheel.
This process causes the slip to flow away from it. It results in hollow ceramic objects such as cups, bowls, and jugs which are taken off of the plaster molds and glazed or painted.
Slip casting is usually done using a mold made from wood and shaped to create the desired object. A bag is placed around this wooden mold and filled with a mixture of water, clay, and sometimes other components such as oxides to create different colors of slips.
Slip can also be easily poured into a more traditional ceramic mold, or shaped by hand before being dried and fired in a kiln.
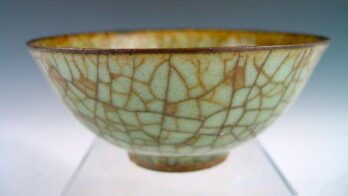
What is Slipware?
Slipware is pottery that has a slip cast, i.e., it is created by mixing clay with water and pouring the slip into a mold rather than forming a pot on a wheel. The resulting pieces are thinner and more fragile than most other types of pottery and clay pieces.
You can decorate slipware in any number of ways, but most frequently, it is glazed. The durable glazes were made by adding mineral ingredients to the slip before it set.
Creative Ways of Using Slip in Pottery
Slip Marbling
You can achieve this decorating technique by pouring a slip trail around wet or leather hard clay. After that, apply colored slips with an applicator to create lines and dots. Moving or using a pottery wheel faster causes more slip to drip and move, which makes stunningly unique patterns.
Feather Combing
Feather combing is one of the most enjoyable slip decoration methods to use. First, you’ll need to wet your damp pottery and pour on a thin layer of slip before using an Applicator to apply bands of colored clay slip to the surface. After that, you’ll need to spread these bands out evenly using a sharp-pointed tool like the end of a paintbrush into patterns.
Slip Trailing
In terms of popularity, slip trailing is probably the most straightforward and widely used pottery decoration technique. It requires pouring trails of slip onto damp or leather-hard pottery. Even if you’re working with dry materials like bone dry or bisque, it’s essential to use caution when applying slip because it tends to dry quickly. Check out this great video by Matthew Kelly and learn more about this technique:
Slip Painting
Another exciting way of decorating pottery is through slip painting. You’ll need a paintbrush and a colored slip. You use a brush to apply the multiple shades of slips to the pot’s surface. The pot you are working on must be wet or leather-hard to begin with before you can start. To apply to the pot’s surface, you can use a painting brush or a sponge.
Closing Thoughts
So those are some things you should know about slips in pottery! There are many more uses for slips, but if you are new to ceramics or have not taken a slip class, I hope you have been able to learn something new here. If there is anything I missed or questions about some of these processes, please comment below! Thanks for reading and Keep Creating!


Enter your email below to get our FREE beginner friendly tips.
By entering your email address you agree to receive emails from Potters Passion. We'll respect your privacy and you can unsubscribe at any time.