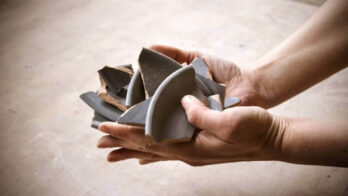
Air-dry clay is a fun and creative way to make sculptures, but it can be frustrating when the project starts cracking.
There are many reasons that this could happen, but some are easily preventable.
That being said, cracking doesn’t have to be a disaster – if cracks are forming, there’s a way to fix them!
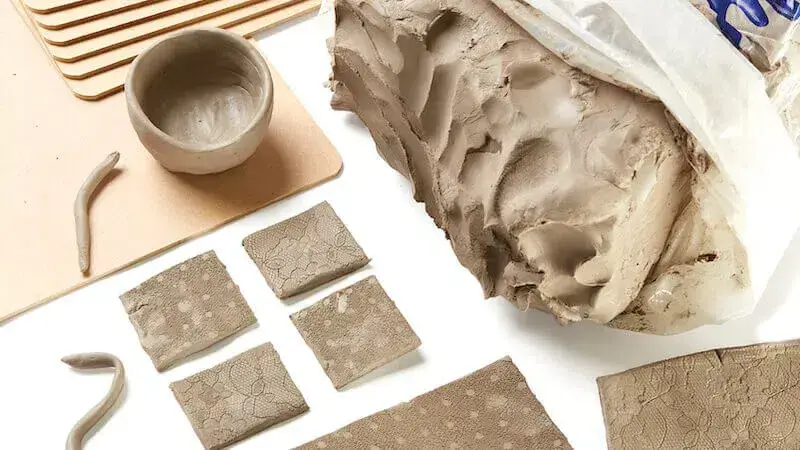
What Types of Air Dry Clay Are Available?
Brands like Pearl Paperclay and Creative Paperclay are available, and Activa Plus Air Dry Clay and Crayola Model Magic for sculpting with kids. In addition, you can make your own air-dry clay by combining corn starch and white glue to form a simple handmade ‘clay’ known as cold porcelain. Although it’s not clay, it has similar properties, and you can mold it into shapes before setting.
So How Do You Keep Air Dry Clay From Cracking?
Firstly, don’t expect clay to behave like pottery clay. That is because it’s not fired in a kiln after forming, so cracking won’t be an issue. However, there are things you can do to preserve the integrity of your masterpiece and avoid cracking when working with air-dry clay.
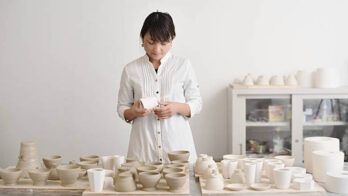
Air-dry clay has unique properties that make it a popular sculpting material for first-time artists and professional artists alike. For example, air dry clay is inexpensive and widely available through craft shops or hobby stores.
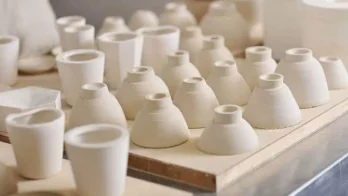
One of its most significant selling points is that it dries naturally, so there’s no need to fire the clay in a kiln. It does take some time before the clay is completely dry, but it will be rock-hard when finished. There are a few things to keep in mind while sculpting, though.
First of all, the texture of air-dry clay is not as smooth as ceramic clays used for pottery. Because of its coarse texture, you should avoid cutting directly through the clay with tools that have sharp edges or points.
Air-drying clay has several advantages, but it also has drawbacks. It begins reacting to air the minute you expose it to air. As you knead and mold it, it inevitably loses water and gets stiffer.
The good thing is that you have options when it comes to fixing this. So please keep reading to learn how to work with air-dry clay without having it break down.
Our Top 7 Tips to Stop Air-Dry Clay From Cracking
Air-dry clay is a fun medium to work with, but it can be frustrating when your pieces crack or break. To avoid these problems, follow our tips for making the most of this type of clay!
1. Use a Wax Lined Paper
Air-dry clay is naturally moist and sticky. If it gets on your work surfaces, it will be difficult to remove. Therefore, using wax paper to line surfaces is highly recommended. As a bonus, you’ll be putting less stress on the clay because you won’t have to pull it off the countertop.
2. Knead it
Before you begin shaping the clay, spend several minutes kneading it. This is called ‘conditioning,’ and it’s a quick and easy way to soften your material clay so that it’s ready for rolling.
3. Don’t Roll Too Thin
A quarter-inch thickness is a good starting point when working with air-dry clay. For quick drying and minor cracking, stick with a thickness of 3/16″. The faster it dries and hardens, the thinner the material must be. The more rapidly the clay hardens, the more cracks appear. To that end, a quarter-inch thickness is a good compromise.
4. Don’t Add Too Much Water
In the same way, water follows the same rule. I highly recommend that you add a little water while you’re molding. Because it’s soft and pliable, to begin with, the clay will fracture and distort as you work with it. It’s a good idea to smooth out any blemishes as they appear, just like you would with ceramic clay.
Clay that has not hardened makes this task simple. You can gently touch with a fingertip dipped in warm water and smoothed over any crack.
5. Create Strong Joints
Single-piece shapes are always the strongest because seams and joints are so susceptible in clay structures. Knowing how to build strong connections is essential because most clay creations have numerous linked elements. To begin, make sure the surfaces you’re joining are completely dry.
To make the joint, you’ll need to apply a wet glue-like substance called ‘slip.’ You can use the slip as glue. To make it, soak clay leftovers in water until they dissolve and form a wet sludge. Then, as an adhesive, it’s applied to adjoining surfaces using a paintbrush.
6. Allow It to Dry On All Sides
The most reliable method of drying is to apply heat evenly to all surfaces. To put it another way, make a few attempts to rotate the object. Every surface requires a certain amount of air exposure. The drying time of air-dry clay ranges from 24 to 48 hours.
Temperature, humidity, and exposure to sunlight are all factors, as is whether or not the clay is drying evenly on all sides. Ensure that the bottom is dry by flipping it over. Clay dries best in a warm, dry cupboard or storage cabinet.
7. Properly Store Leftover Clay
At the beginning of the sculpting process, the better your clay is, the more likely you will produce a perfect work of art. Any clay that is left over should you can store in an airtight container like a Tupperware container. Sandwich and refrigerator bags, as long as you can seal them, are acceptable substitutes as well. The clay will not dry and will remain malleable if there is little or no air present.
Is Air Dry Clay Stronger Than Ceramic Clay?
Because they do not undergo any heat treatment, Ceramic clays will always be more robust than air-dry clays when finished. Because treated ceramics are water-resistant, they are much more durable than regular ceramics. On the other hand, air-dry clays can be extremely tough and long-lasting if given ample time and ideal conditions to set and harden properly.
Air-dry clay works must be kept free from water and humidity to ensure maximum lifespan. The use of sealers and paints extends the piece’s life and compensates for the clay’s sensitivity to tiny details.
Why Should I Work with Air Dry Clay?
Using air-dry clay has various advantages, but you should also see if any other materials would better fit your project instead of air-dry clay. Working with air dry clay can be difficult at first because you’re sculpting as the material is drying, but the results are worth it.
Due to the lack of heat treatment, this ceramic never needs to be ‘finished.’ It simply dries. As a result, new parts can be added to a project even after it has dried completely.
The Final Word
Air-dry clay is a fantastic material for crafters who want something they can use everywhere. If you’ve ever worked with traditional ceramic clay, you know how time-consuming it can be. It comes in a wide range of forms, including clay that’s safe for children.
In comparison to ceramic clay, this material is more likely to dent rather than chip or shatter.
And remember – don’t worry if your first sculpture doesn’t turn out. Practice makes perfect. Keep working on it!
Would you like more information on air-drying clay? Why not read out our guide on the best air-dry clays for simple and creative crafting.
There you have it. I sincerely hope that these hints and techniques for preventing cracking in air dry clay were helpful to you.
Stay Safe and Keep Creating!
Want to expand your Pottery knowledge? Check our other posts on pottery advice and information.


Enter your email below to get our FREE beginner friendly tips.
By entering your email address you agree to receive emails from Potters Passion. We'll respect your privacy and you can unsubscribe at any time.