There is no definitive answer to how long glaze needs to dry before firing. The amount of time it takes for the glaze to dry will vary depending on the type of glaze, the atmospheric conditions in your kiln, and other factors.
This blog post will explore general guidelines for how long you should wait before firing your glazed pieces.
What is Glaze & What Does it do for Pottery?
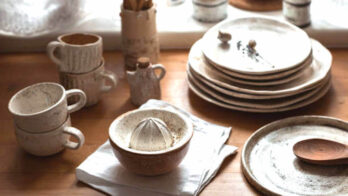
Glaze is a smooth, glossy coating that is applied to pottery. It is typically made from a mixture of silica, alumina, and fluxes. Glaze can be applied to a piece of pottery inside and outside. It helps to protect the pottery from water and dirt, and it also gives the piece a more polished look.
Glaze can be applied before or after the pottery is fired. If it is applied before firing, it is known as a greenware glaze. If it is applied after firing, it is known as an overglaze. Glazes can be translucent or opaque, and they come in a variety of colors.
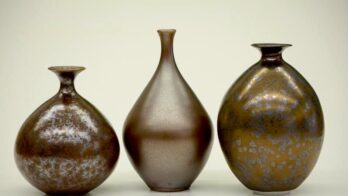
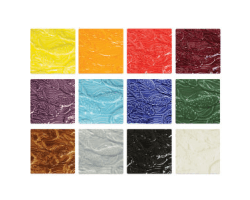
Some common types of glazes include lead free glazes, earthenware glaze, and stoneware glaze.
Laguna’s Lead-Free Gloss Glazes provide a bright, non-leaded range of opaque colors. This series is safe for use on food and beverage containers when properly fired.
Glaze Drying Time for Quality Results?
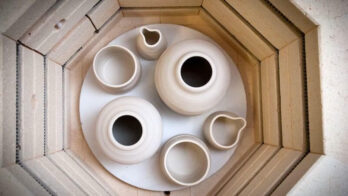
Anyone who has ever tried their hand at pottery knows that a successful piece requires careful attention to detail at every stage of the process. Glazing is no exception. Once a piece has been shaped and dried, it needs to be coated in a layer of glaze before you can fire it. But how long does glaze need to dry before firing?
The drying time of a glaze is affected by the type of glaze, the thickness of the application, and the ambient humidity.
Water Based Glaze
The most common type of glaze is water-based, which dries through evaporation. Water-based glazes are easy to apply and offer a wide range of colors and finishes. However, they can be more susceptible to crazing or cracks that form in the glaze as it dries.
Oil Based Glaze
Another type of glaze is an oil-based glaze, which dries through oxidation. Oil-based glazes are more durable than water-based glazes, but they can be more difficult to apply evenly. In addition, oil-based glazes typically have a more muted color palette.
Wax Based Glaze
Glazes that contain waxes must dry through evaporation and the action of the waxes. Therefore, the thicker the layer of glaze, the longer it will take to dry. For example, applying a thick layer of glaze to a vase may take several days for the glaze to completely harden. In contrast, a thin layer of glaze will dry much more quickly.
If it is not dry enough, the piece may not come out of the kiln correctly. If it is too dry, the glaze may not adhere properly to the surface of the pottery. The ideal time to fire a piece of pottery will vary depending on the type of glaze used, but most instructions recommend waiting 24 hours before firing.
By taking care to ensure that the glaze is thoroughly dry before firing, you can help ensure that your pottery comes out looking its best.
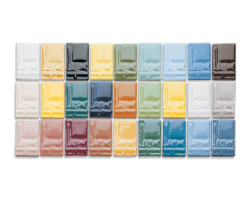
Amaco Liquid Gloss Glazes feature popular brilliant colors and fire to a smooth, glossy finish at a witness Cone 05. Amaco Liquid Gloss Glazes are food safe.
Tips for Speeding up the Drying Process
One of the most frustrating things about glazing ceramics is how long it can take for the glaze to dry. However, you can do a few things to speed up the process without compromising quality or safety standards.
1. Make Sure Your Work Area is Well-Ventilated
Ventilation is key when working with glaze. By ensuring plenty of airflow, you can help prevent the build-up of dangerous fumes. In addition, ventilation helps to speed up the drying time of the glaze so that you can get back to work sooner.
2. Use a Fan to Circulate Air Around the Piece
If possible, use a fan while working so that air circulates around and on top of each ceramic piece during this process.
3. Increase the Temperature of the Room Gradually
Ensure it’s at room temperature before adding additional heat sources such as lamps or heating pads (although you should only use these last two after 24 hours).
4. Allow the Piece to Sit Undisturbed
After you’ve glazed your pottery piece, it’s important to let it sit undisturbed so the glaze can properly set. However, moving it too soon can cause the wet glaze to smudge or run, ruining all your hard work. So how long should you wait?
Generally, it’s best to let the glaze dry for at least 24 hours before moving it. If possible, find a spot where the piece can sit undisturbed for that entire time.
Risks Associated with Improperly Dried Glaze
When glaze is applied to ceramics, it needs to be properly prepared and mixed to ensure that it will adhere to the piece and remain durable. If glaze is not properly applied, or if it is not allowed to dry completely before being fired, it can cause a number of problems.
For example, the glaze may not adhere to the ceramic, resulting in bare spots or an uneven finish. In addition, the glaze may crack or peel after firing, potentially ruining the piece. Improperly dried glaze can also lead to impurities in the final product.
To avoid these problems, following directions carefully and allowing the glaze ample time to dry before firing is important. With proper care, ceramics can be successfully glazed and fired.
Benefits of Properly Dried Glaze
The benefits of properly dried glaze are numerous. For one, it helps to prevent cracks and crazing in your pottery. It also makes your pottery more resistant to staining and scratching, and it can help improve your pieces’ overall durability.
Additionally, the properly dried glaze can give your pottery a glossy finish, making it more visually appealing. And finally, a properly dried glaze can help seal in the colors of your pottery, preventing them from fading over time.
All these factors contribute to the overall look and feel of your finished pottery pieces, making them more beautiful and longer-lasting.
How to Tell if Your Glaze is Properly Dried
If you’re like most potters, you’re always looking for ways to improve your glazing process. After all, there’s nothing quite as frustrating as spending hours (sometimes even days) perfecting a piece, only to have it come out of the kiln looking less than perfect.
So how can you tell if your glaze is properly dried, and what should you do if it’s not?
There are a few key things to look for when checking if your glaze is properly dried.
First – the surface of the glaze should be dry to the touch.
Second – the glaze should be evenly applied across the surface of the pottery – if it’s too thin in some areas or has runs or drips, it’s unlikely to be properly dry.
Finally, try gently tapping the pottery – if the sound is hollow, that means the glaze is still wet and needs more time to dry.
Conclusion
There is no definitive answer, as it depends on the type of glaze and kiln you are using. However, a general rule is to wait at least 24 hours before firing your glazed pieces. This will give the glaze enough time to fully cure and prevent any problems with adhesion or bubbling.


Enter your email below to get our FREE beginner friendly tips.
By entering your email address you agree to receive emails from Potters Passion. We'll respect your privacy and you can unsubscribe at any time.