Creating pottery is a fun process that does require several steps. From choosing the right clay to forming the perfect shape, this is only the beginning of making your very own unique pieces. Working with porcelain is similar to working with clay, but many wonder, does porcelain need to be fired?
Learning how to handle porcelain correctly will give you new skills in creating your own pottery. It is a beautiful medium that you can do a lot with.
Porcelain: A Brief Overview
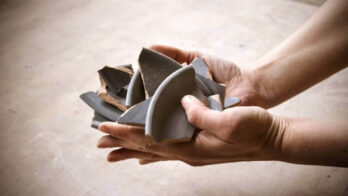
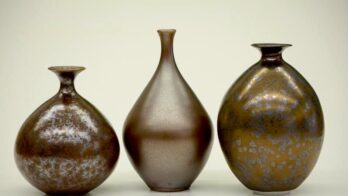
When handling porcelain in its finished state, it is a very delicate material that can easily crack or break. This makes for a careful process when you take on the endeavor of making your own. This effort is worthwhile because porcelain is also a high-quality material when crafted properly.
Most do not realize that a few different mediums are involved when working with porcelain. It is a mix of china clay (kaolin) and china stone (petuntse).
Standard Ceramic Porcelain Clay is a white clay body formulated for firing at Cone 6. Plastic and throwable, it has a shrinkage rate of 12% and an absorption rate of 2%.
Three Types of Porcelain
Hard Paste: This is more of a ceramic type of material that is fired at a very high temperature. It mixes kaolin and petuntse to create a more durable type of porcelain. Most professionally-created porcelain products are created with this hard paste mixture. Because you must fire it at 2,552°F, attention to detail is necessary.
Soft Paste: When using soft paste, you mix white clay with frit. This glassy compound is crafted by combining white sand, gypsum, soda, alum, nitrate, and salt. Lime and chalk are then used as glue to hold everything together. This is fired at a lower temperature than the hard paste.
Bone China: This is a more intricate form of soft paste porcelain that contains bone, ash, kaolin, and feldspathic material. It has a more translucent body and is commonly referred to as “china.” Most of what you see in stores that is authentic is likely made using the bone china method.
Does Porcelain Need to be Fired?
Porcelain does need to be fired, just like traditional clay pottery. However, when trying to make it on your own, following specific steps is essential for achieving the desired outcome.
How to Fire Porcelain

- Begin by bisquing the porcelain you crafted. Make sure the items are completely dry before doing so. You will load the kiln and set the shutoff between 1,600°-2,000°F. Then, you will preheat the kiln with the top peephole remaining open. Assuring the temperature does not exceed 250°F, wait until there is no more steam coming from the kiln. This will take several hours.
- You will then set the kiln to increase in temperature by 7°F per minute until the correct temperature is reached. Because you set a shutoff temperature, the kiln will turn off itself. You will then want to cool the items for at least one full day before going on to the next step.
- Unload and glaze your items. Prepare the kiln by placing a coat of kiln-wash on the shelves. Using a brush to apply the kiln glaze will prevent the items from sticking once they get really hot.
- Load the glazed porcelain into the kiln. After closing the lid, set the kiln to the manufacturer’s suggested temperature. This usually ranges anywhere from 2,000°-2,500°F. With the top peephole open, set the temperature to 250°F for the first hour.
- Set the temperature to increase by 10°F per minute. Check on the kiln every 30 minutes to ensure it is working properly. Double-check the process manually as well by using a pyrometer. You will simply hold the tip into the peephole to get your reading.
- When the kiln shuts off, you will wait for it to cool completely. Wait two to three days before opening the lid.
Additional Tips and Tricks
You now understand the process of firing porcelain. When asking yourself, does porcelain need to be fired? The answer is yes. These tricks will help you when creating your own porcelain items.
Wedge
When working with any type of porcelain, wedging the clay is necessary before molding it. This will ensure it is free of air bubbles and pliable enough to form without breaking or taking on an uneven texture.
You should begin this process a few days before you plan on molding the clay for a few hours each day. In doing so, the water particles will be evenly distributed throughout the entire clay ball. This makes it easier to work with once you put it on the wheel.
Center
Making sure the clay is centered while working with it will help create the exact shape you seek. Porcelain should always be centered and coned in order to line up each clay particle.
Coning is similar to wedging and creates an even better texture for the outcome of the porcelain item you are crafting. Make sure you allow the porcelain to rest each time you wedge it because it is prone to cracking and fatigue. It takes patience, but it is worthwhile!
Moisten
Porcelain does get thirsty and requires plenty of moisture. You can add a spoonful of vinegar into the mixture when working with it to ensure the clay is properly lubricated. This is going to make it pliable and flexible enough to be molded. It will also become less prone to cracking and breaking once fired in the kiln.
Conclusion
This guide highlights what you need to know to create fantastic porcelain pieces. By following the steps carefully, you will be sure to have fantastic outcomes with the medium. Whether you want to try it out for fun or turn the process into something you do regularly, this guide still applies to all your questions regarding porcelain and how to work with it.


Enter your email below to get our FREE beginner friendly tips.
By entering your email address you agree to receive emails from Potters Passion. We'll respect your privacy and you can unsubscribe at any time.