The process of firing clay might be intimidating for someone just starting out, especially if you are using a brand new kiln at home for the first time. Still, it isn’t nearly as difficult as it would at first appear, and there is nothing quite like the exhilaration of opening a kiln to see what you have made!
To begin, let’s dispel some myths surrounding the process of firing clay. To get started, it is helpful to have a solid understanding of the processes that take place inside the kiln.
The Different Stages of Kiln Firing
Ceramists prefer to fire their kilns quickly in order to save both time and energy. However, rapid firing might lead to numerous errors. Slowly fire greenware, especially in the first stages.
If a fast greenware fire results in glaze crazing, pinholes, or cratering, the time saved is not worth it. Slowing down the firing at the end of the kiln to allow the glaze faults to repair is common.
The more densely packed the kiln and the thicker the ware, the slower the kiln must be fired to ensure that the heat reaches all of the ware. Pieces with thin and thick areas must also be fired slowly to allow the thick areas to catch up to the thin areas.
Stage One: Water Smoking
Up to 800 – 900°F (426 – 482°C)
Water is present in all clays. Ceramic greenware undergoes the initial stage of fire, which removes the water from the material. Water expands as it gets hotter, which causes it to be forced out of the clay. Water smoking is a term for this.
Trying to fire too quickly can have disastrous results at this point. Increasing the temperature of a kiln to more than the boiling point of water will cause the water in the clay to expand too rapidly. If the ware breaks while firing, it’s most likely at this key point. The kiln’s walls might be damaged and the ware when water boiling inside the clay explodes.
You know you’ve gone too quickly when the pottery inside the kiln sounds like popcorn. To allow the water to escape, keep the kiln’s temperature as low as possible when water smoking, no higher than 200°F (93°C).
Stage Two: Dehydration and Quartz Inversion
900° – 1100°F (482°C – 593°C)
At around 1100°F (593°C), the clay continues to lose water at a molecular level after the initial water smoking stage. The clay undergoes a chemical transformation into fired pottery at this phase.
At this stage, the clay undergoes quart inversion, when the silica within it expands at around 1060°F (571°C). The molecular water must escape the clay slowly, especially if the clay pieces are large. This happens between 900° and 1100°F (482°C and 593°C).

Stage Three: Oxidation
500° – 2000°F (260°C – 1093°C)
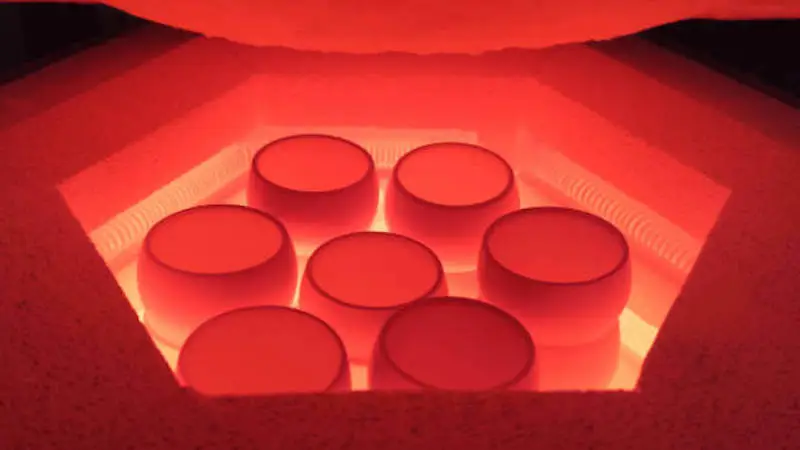
During the Oxidation stage, impurities are oxidized out of the clay, which occurs throughout the entire fire process. The kiln must be filled with oxygen for the impurities to be burned out. In order to allow impurities such as carbon to become gases and combine with oxygen, the ware must be heated slowly.
Weaker pottery and larger loads necessitate a longer firing time than thinner wares. At higher temperatures, clay’s constituents fuse and seal the clay’s surface. The remaining carbon and other contaminants are now trapped inside the ware.
Bloated and cracked ware is caused by the trapped gases expanding beneath the surface. Gases that did not burn off completely in the greenware firing frequently cause glaze pinholes, bubbles, crazing, and peeling.
During the heating of the glaze, these gases rise to the surface. For lead-free glazes, trapped gases can be particularly damaging to their properties. These glazes lack the flux that smooths out imperfections in the glaze. A buildup of contaminants causes white bodies to turn grey and weakens finished ware.
Stage Four: Maturity
1300° – 2300°F (704°C – 1260°C)
At this stage in the process, the ware will have been altered by the heat to the degree that the clay manufacturer had intended.
Over-glazes – 1000° – 1500°F (537° – 815°C)
Low-fire ceramics – 1700° – 2100°F (926° – 1148°C)
Porcelain and stoneware – 2100° – 2400°F (1148° – 1315°C)
You can find the recommended temperature for firing your clay from your clay provider.
When to Speed Up the Firing
Faster bisque firings are possible after the quartz inversion, which takes place at between 1000° and 1100°F (537° and 593°C). The clay has been totally dried out by this point. The clay’s speed will vary for a given amount of impurities.
Take a break from the heat during the final 200°F (111°C). When it comes to firing speed, there are several variables to consider. Low-fire ceramics can be fired more quickly than stoneware because they have a thinner wall.
Try out your designs in a small-scale kiln. You should try out different fire speeds before putting a whole bunch of pieces in jeopardy. Always test-fire clays you’ve never worked with before using them in a project.
Even if your results are good, you can always run more experiments at higher and higher rates of fire until you achieve your desired firing speed. Fast and inadequate venting is more dangerous than any other method of fire.
If the clay and glaze are made correctly, you can get reliable results by firing slowly, venting well, and utilizing witness cones. The fundamentals of firing are summarised below.
Be aware that firing speed, particularly during cooling, can significantly impact the final glazing.
Venting
The kiln must be ventilated at the beginning of a ceramic firing to eliminate the gases and moisture. The kiln will rust if moisture is not removed from it as soon as possible. When the kiln’s hot air expands, it pushes its way out through the firebricks, stainless steel case, and switch box, where it may escape.
Note: If you are trying to reduce the temperature in the room by using a fan, you should not allow the fan to blow air into any open peepholes.
Manual Venting (Without a Motorized Vent)
Removing the peephole plug(s) and propping the lid is the most basic venting method. Lower the lid all the way and shut the bottom peephole after the venting period is over (if your kiln has more than one peephole).
The top peephole stopper can be left out during the firing. You should insert the top peephole stopper after the venting period has ended if you are experiencing glazing defects near the peephole. Peepholes aren’t always the best spot to put a piece of glazed pottery.
Note: You should not replace the top peephole plug once the venting period has concluded. This enables further venting at all stages of the firing process
Crossdraft Kiln Vent System
The most basic form of ventilation, a cross draft system, uses fans positioned close to the kiln to transfer air from the surrounding region and expel it out an open window or door in the immediate area.
If you want to utilize this method, ensure that the lid is propped open throughout the time the carbon is being burned and that the top peephole if it has one, is left open.
Even though this is the simplest and least expensive ventilation technique, it only eliminates a small portion of the exhaust that should be avoided from the kiln.
Updraft Kiln Vent System
A ventilation system with an updraft eliminates vapors as they rise through the system. It consists of a hood with a fan positioned over the top of the kiln and can either be custom built by a HAC contractor or bought ready produced.
When employing a hood, it is essential to remember that it must be rotated before the kiln is loaded to prevent ceramic glaze dust exposure. Failing to do so could result in dust being released into the air.
The Downdraft Vent
In a downdraft vent system, the air is sucked into the kiln through tiny holes in the bottom, causing a slight negative pressure. The kiln is constantly replenished with fresh air, ensuring that the air being sucked out is replaced.
A front-loading kiln’s vent air collection cup is typically mounted on the back wall, while a top-loading kiln’s is located underneath. Through the use of small holes drilled into the firebrick, the vent eliminates the harmful vapors.
A downdraft venting device increases the quality of the firing process while also removing kiln exhaust gases. In addition, it pulls fresh oxygen into the kiln, which results in noticeably brighter colors, particularly when red and orange glazes and decals are used.
A downdraft vent pulls air from the kiln, mixes it with the air in the room, and then pushes it outside via a vent pipe when it has been diluted.
Note: The vent, which allows fumes to bypass the tube, helps switch-operated kilns last longer since it improves the life of the Kiln Sitter tube assembly.
Cooling
The rate at which certain glazes cool has a significant impact on the glaze’s final appearance.
Slow Cooling
By slowing down the cooling process of their electric kiln, people discover that they can achieve a glazing effect that they previously thought was only achievable in gas kilns. In addition, because the inside of a pot cools more slowly than the outside, some glazes look nicer on the inside than they do on the outside.
Glaze appearance is strongly influenced by the cooling temperature range of 1800 to 1400 degrees Fahrenheit (1000 to 760 degrees Celsius). Therefore, turn the elements on again to slow the cooling down in this range.

Fast Cooling
You may have to cool a load quickly if you’re on a tight schedule. Using a downdraft vent can cut your cooling time in half. Another option is to blow air into the kiln with a tiny fan. You will shave off about 1 1/2 hours of the cooling time.
Ensure the lid is fully closed and the peephole plugs are in place. You should not point the fan at the peepholes; instead, it should be pointed away from them on the other side of the kiln.
Too rapid a cooling rate might lead to issues such as fracture of the utensil. If this occurs, reduce the cooling rate from 1000°F – 500°F (537°C – 260°C).
When Can You Unload the Kiln?
Before unloading the kiln, you must wait until the temperature has cooled to room temperature. The goods must be at a temperature where you may unload them barehanded. Otherwise, glazes run the risk of cracking. If this occurs, the glaze will contract on the ware, causing the ware to produce a very slight pinging sound.


Enter your email below to get our FREE beginner friendly tips.
By entering your email address you agree to receive emails from Potters Passion. We'll respect your privacy and you can unsubscribe at any time.

