So, can you fire pottery in an oven at home? In a nutshell, the answer is yes.
There are, however, drawbacks primarily because of the irregularity of the heat produced. In addition, a domestic oven’s temperature cannot make glazed pottery because there is little control over maintaining an even temperature.
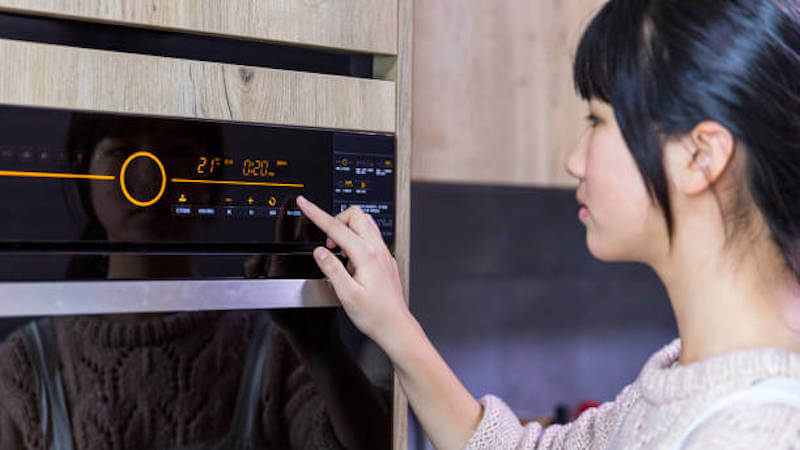
However, conventional oven firing can be a fast and convenient way to dry and fire clay objects. The most commonly used household ovens are standard electric ovens with three elements (one at the top and two at the bottom) or single-element convection ovens.
These appliances work well for baking, roasting, and slow cooking, but modern ovens can’t withstand prolonged direct heat, especially at temperatures commonly used for standard pottery clay items.
Therefore, if you plan to use your regular oven for firing pottery, you must first check that it can hold the required temperature (usually up to 300°C/570°F) for the amount of time needed without internal damage or weakening the oven structure.
It’s not a good idea to use this method for large-scale commercial ceramic firing, but it’s a good idea for home use or as a solution for beginners. The major disadvantage of using a kitchen oven is that it cannot reach the temperatures required for glazing. Since domestic ovens typically operate at lower temperatures, only certain types of clay will work when fired.
How to Fire Pottery in Your Kitchen Oven
A domestic oven can be used as a substitute kiln by following these simple steps:
- Preheat the oven. Position the pottery on baking shelves or baking sheet upright, leaving enough space between pieces for air circulation.
- Do not allow the pottery or clay pots to overhang the edge of a shelf or sit flat in a pile, as this can cause parts of your piece to become overheated and crack during firing. Ensure pieces are not touching each other either.
- Ensure that your home oven is clean before use. You can do this by running it through its self-cleaning cycle, turning the temperature up to high for 30 minutes. If you cannot run your oven through a self-clean program, wipe it down with an all-purpose cleaner and thoroughly rinse with water afterward.
Pottery is very sensitive and cracks and breaks easily, and the home oven adds to these risks. You mustn’t rush or force pieces into or out of the oven during baking. To avoid breakage, watch your clay items closely while in the oven at high temperatures, as hot air can cause them to move unexpectedly.
The Best Type of Clay to Bake in a Home Oven
Polymer types of clay are the best clay body to use, and it is designed for baking in household ovens. Because polymer clay consists of a mixture of polyvinyl chloride (PVC), oil, and water, it holds up well in the dry heat of your home oven. Once dried, this clay type will remain solid and durable for many years without degrading.
Here are our top picks for the best clay to use in your oven at home:
Original Sculpey Oven Bake Clay
Oven-bake polymer clay is Polyform’s original basic polymer clay. This white Sculpey clay, which comes in a 1-pound bag, is incredibly soft and pliable, and it won’t dry out even after being exposed to the air for a long time.
Sculpey is versatile and high-quality, making it ideal for everything from jewelry to crockery and decorative items. As soon as the clay has been baked and allowed to cool, it is strong enough to handle drilling, sanding, and carving before being decorated with acrylic paint.

Sculpey Premo Polymer Oven-Bake Clay
You can’t go wrong with Sculpey Premo. The variety of colours and styles available will allow you to create a wide range of sculptures. If you’re an experienced clay artist or just getting started, this clay is ideal for your needs.
In addition to being able to blend easily, premo clay retains fine detail and specialised techniques after conditioning. You can choose from 2-ounce, 8-ounce or 1-pound quantities and 54 bold colors including glitters, metallics, granites and opal.

STAEDTLER FIMO Soft Polymer Clay
Polymer soft clay from Staedtler comes in a variety of bright colors and is sold in 57-gram blocks so you can make your own polymer clay set. Fimo polymer clay is ultra-pliable when soft and break-resistant once you have oven-baked it. This quality clay is a lot of fun for kids and adults, and you can make some great oven-baked clay pieces.
Fimo is a modelling clay that is suitable for adults who are new to art or who want to improve their skills. Because it is soft and pliable, it is extremely easy to shape.

7 Tips for Firing Clay in the Oven at Home
- Preheat the oven for at least 45 minutes before placing pieces inside. Set the oven temperature to 350-375 degrees Fahrenheit/180-190 degrees Celsius. The higher the baking temperature, the more likely that cracks will appear in your clay. If you are experiencing cracking, try baking your work at a lower temperature.
- Do not open the oven to peek during cooking time. Every time you remove a load from your oven, the temperature drops 25-30 degrees F/15 – 17 C. Replacing it resets the clock on how long you have left to cook things in there. It is best to ensure everything has reached perfection before removing each of your clay projects from the oven. If you need to, turn off your oven and let it cool down completely before continuing with further baking projects inside.
- Extreme temperature changes (for example, putting hot pots directly into cold water) can cause thermal shock and your clay creations to crack or explode. Always let the clay items cool for several hours before washing, storing, or moving them. Heat retention varies depending on how porous a piece is. For example, terra cotta absorbs heat very quickly and will stay warm for a long time after removing it from the oven. Traditional stoneware or porcelain will not absorb as much heat, and they cool off quickly.
- If you wish to bake several clay pieces at once, be sure to stack them on a bed of aluminum foil. It protects the bottom of your work from getting too hot and burning a hole in your oven. Arrange pieces of pottery evenly on a cooking sheet or large flat baking dish so you can quickly move them around if necessary.
- Keep a note of how long each load takes by writing down the time you put something inside and jotting down when you take it out again. It will help you work out how much longer subsequent pieces need to bake if they are thinner or thicker than your first batch.
- Try moving items around once or twice while firing them, just enough to bake evenly on all sides instead of just one side. It will prevent any part of the piece from becoming too soft and lower its risk for cracking.
- Don’t use your best baking sheet for pottery. Instead, line the oven with aluminum foil or unbleached parchment paper to protect it.
Safety Recommendations
It is essential to follow basic safety precautions when using your home oven to fire pottery. Here are some basic guidelines:
- Don’t let children touch a piece, and don’t touch it yourself until you are sure the pot has cooled down enough.
- Always wear eye protection when removing pots from the oven. Some pieces may break unexpectedly, and hot pots can go flying if they shatter. If possible, wear safety gloves too, to protect your hands. Don’t reach into an oven that is still at full temperature.
- Don’t leave pottery unattended in the oven as it may explode or result in clay cracking without warning.
Use a Polymer Clay Oven Thermometer
When it comes to the temperature, many ovens are erratic and unreliable. In some cases, you may have noticed that your oven has hot spots or takes a long time to cure your clay. A good oven thermometer is an absolute necessity when baking clay at home in your domestic oven.
The oven temperature must not be too high or too low in order for polymer clay to properly cure. Most polymer clay is heat-resistant and won’t burn if your oven is set to a slightly higher temperature than recommended. It’s possible, however, that an overly hot oven will cause your baked goods to burn and scorch. If you bake polymer clay at too low a temperature, you’ll end up with an underbaked, flaky piece of work.
How to Decorate Your Finished Piece
Once your clay items are finished baking, let them cool down completely before starting to decorate. Then use paint, markers, or any other decoration materials of your choice. Finally, you can ‘paint’ on the design using a paintbrush or any other creative way of getting the paint to adhere to the clay.
You have a wide range of options to decorate and embellish your home-baked pottery, including the following:
- Painting with acrylic paints.
- Applying a design with a sponge.
- Marking a design with various stamps.
If you want to create unique designs on your oven-baked clay items, knowing how to do something called underglaze resist is essential. The term ‘underglaze’ means before the glaze goes on top of the paint. ‘Resist’ simply means you paint on a layer that will not allow the paint to stick to it. For example, if you want to create an intricate design and do not have the time or ability to etch in the design with a permanent marker, underglaze resist is an excellent way to start your oven-baked clay creation.
Alternative Pottery Firing Options
Industrial kilns are ideal for firing pottery. They provide even temperatures and can hold lots of clay items in a small space. It is possible to buy a used commercial kiln. However, they can still be pretty expensive and require electricity and ventilation and medium modifications (which can add more expense). Fortunately, there are alternative firing options.
Electric Pottery Kiln
You can pick up a small used electric compact kiln relatively cheaply. These are great for beginners because they keep the cost low, and the learning curve is quicker. Unfortunately, you can’t reach hot temperatures like gas kilns, so they are not great for high fire. Nevertheless, if you live in an area without gas or with expensive gas, this piece of equipment can be a big help.
Gravity-Feed Gas Kiln
A gas kiln is capable of high fire and will last you a long time. A drawback is that firing one takes a while since the clay piece must be kept in the same position for hours during cooling. In addition, it can make it challenging to work with materials that have short working times. There are many models available, from small tabletop kilns to large industrial models.
Brick Oven
If you want faster firings, then your best choice is a brick oven. They are suitable for many firings at much higher temperatures than electric or gas kilns. They are also great for other craft projects like baking, smoking meats, and making pretzels.
Wood Stove
Wood stoves are also used to fire pottery, but they take more attention than gas or electric kilns since you must closely watch the kiln’s temperature. It produces heat by burning bits of wood chips and kindling, pieces of wood, and other combustible material. They are also more dangerous because they are hotter, have open flames, and require moving the kiln around.
Wood Kiln
You can make a wood kiln very quickly. I have friends who have used a simple barrel kiln with sand in the bottom and even a firewood holder to hold their pots for firing. It allows you to raise the temperature very high for bisque or low fire, but the wood will get in the way of a high fire.
I am not an expert on all of these alternative methods, so be sure to do your research and all necessary safety precautions before trying anything.
Conclusion
I hope this article has helped you fire clay in your oven at home. There are many benefits to using clay for pottery, but finding the time or space for a large kiln can be challenging. This is an easy way for anyone with access to their kitchen and some basic supplies to get started!.
And if something goes wrong? That can happen too! Be careful and keep an eye on your pieces while baking, then take them out as soon as possible. The last thing you want to do is let them go so long that there isn’t any hope of saving them from cracking or becoming distorted due to over-firing.
But don’t worry – it’s not hard at all! You just have to know what you’re doing and observe every step along the way. Have you ever fired any pottery in your oven at home? I would love to hear what has been working for you! Let me know in the comments below, and of course, you can stick around and look at our other useful articles and advice.
Keep Creating!


Enter your email below to get our FREE beginner friendly tips.
By entering your email address you agree to receive emails from Potters Passion. We'll respect your privacy and you can unsubscribe at any time.